The nail varnish industry rakes in billions of dollars every year. Millions of women flock to nail bars to get the latest looks. But you can easily recreate these looks at home, saving you money and time. There’s no need for a steady hand or expensive equipment – all you need is a bit of practice, some time, and these easy ideas.
A good manicure starts with preparation. Trim your nails so that they’re all the same length and shape them into an oval if possible. It’s much easier to make an oval shape than a square one, as you don’t have to worry about filing the corners evenly. Buff them with a fine-grit buffer to remove any shine from your nails and soften the edges slightly.
Next up is the base coat. This helps your nail varnish stick better to your nails and prevents staining. Look for a base coat that contains protein as this will help strengthen your nails and prevent peeling or splitting. Apply two coats of base coat, allowing each coat to dry completely before applying the next layer.
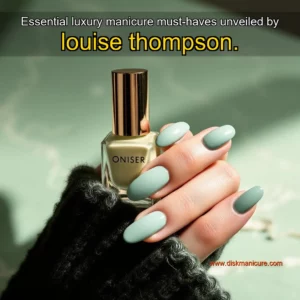
Now it’s time for the fun stuff – choosing a color! Choose one that you like but also complements your skin tone. Pale pinks and nudes work well on cool skin
If your manicure is looking dull and you need to give your nails a fresh coat of paint, you don’t have to rush to the salon. Manicures are one of those things that most people consider an indulgence or a luxury. We always think it’s easier to run out to the salon and let someone else do all the work. But what if I told you that you could have gorgeous nails in half the time just by sitting in front of your TV?
In this blog post, we’ll share some easy tips for doing your own at-home manicure so that you can save money and still get beautiful nails.
1) File Your Nails
The first step is to file your nails into the shape you want. Most women like square or oval shaped nails, but if you prefer an almond shape or a rounded shape, you can make that work too. Just be careful not to file them too short (or file them unevenly) because then they will look weird!
2) Push Back The Cuticle
Next up, use a cuticle stick or orange wood stick (available at drugstores) to gently push back your cuticles without tearing them off. This will help prevent hangnails from forming later on when applying polish or gel
Nail art is always fun, and there are so many pretty decals you can use to create gorgeous nails at home. Before you begin, make sure your nails are trimmed and filed to a shape that appeals to you. Then add a base coat of clear polish or one that matches the color of your nail tips. Next, do an opaque coat of polish in the color of your choice. While it’s still wet, paint on some nail art from the kit of your choice, or use gold glitter nail polish for a classy look. Seal in the design with another layer of clear polish, and you’re ready to go!
If you prefer not to have any designs on your nails, there’s an easy way to give them a little extra sparkle. Just add a coat of metallic nail polish after the basecoat is dry. This will help prevent chipping and give you a glossy surface too.
You don’t have to spend a lot of money on salon manicures if you take care of your nails at home. Start by painting them with a clear basecoat that matches the color of your fingernail tips. Then do an opaque coat in a shade that matches your skin tone, like pink or peach for fair skin tones or red for darker ones.
Step 1: Clean Your Nails
Before you begin, cut or file your nails to the length you desire. Then, cleaning your nails with soap and water will help remove any dirt or oils that could prevent your polish from adhering. Just be sure to remove any soap residue before polishing.
Step 2: Shape Them
You can use a nail clipper to cut your nails first, but then use a file to shape your nails. If you prefer square-shaped nails, use a square file by making forward strokes in one direction. If you want round nails, file in a circle motion. Remember never to file back and forth; this causes your nail to weaken and tear.
Step 3: Push Back Your Cuticles
After filing your nails, push back the cuticles with a cuticle pusher or an orange stick wrapped in cotton. Do not cut them! Cuticles are there for a reason—they protect the new growth of skin underneath your nail bed from bacteria and other germs that could cause infection.
Step 4: Buff Them Smooth
Buffing is an important step because it smooths out ridges on the nail’s surface so that the polish can adhere better and last longer. Use a four-way buffer by applying
You don’t need a trip to the salon to get gorgeous nails. Whether you’re looking for a fresh take on the classic manicure, some nail art inspiration, or even just tips for keeping your nails healthy, these ideas are sure to have something for everyone.
1. If you’re having trouble painting your nails and keeping them looking neat, here’s a great trick: After you paint your nails with two coats of color and they’ve dried, dip a cotton swab in nail polish remover and go over any smudges that may have gotten on your skin while painting. It’ll clean up the edges so your manicure looks perfect!
2. To make your nails look super shiny, after you’ve painted them with two coats of color, wait until they’re dry, then brush a layer of clear topcoat on the very tip of each nail. It’ll give you that extra pop of shine at the very end of your manicure!
3. For an easy twist on the classic French tip manicure, paint a thin line of silver glitter polish along the top edge of each nail where the white would normally be. It’s unexpected but still sophisticated!
4. If you love polka dots but aren’t too great at painting
For the cost of a manicure, you can buy all the tools you need to give yourself great nails at home. If you’re looking for an easy way to save money, do your own nails. You can make your nails look gorgeous with a few easy steps.
The easiest way to save money on nail care is to do it yourself. You’ll pay about $10 for a manicure and $20 for a pedicure. If you do your own nails, you’ll only have to pay for the supplies. You can get a good set of nail clippers, nail files, and emery boards for less than $10. That’s less than the cost of one manicure!
When you think about it, there’s no better way to practice your manicure than on yourself. You already know what products you like and what to avoid, which colors are easiest for you to use and which nails are the trickiest to work with (all of them for me!). You also know what works for your lifestyle—you wouldn’t want to do a gel manicure when you spend a lot of time in water or play sports regularly.
You also know your budget. It’s easy to compare the cost of one at-home manicure with a professional one. If you can save money by doing it yourself, then why not?
When I started doing my own manicures, I was simply avoiding the high cost of getting regular manicures. But now that I’ve been doing my nails at home for years, I can tell you that it’s more than just a financial decision; it’s a matter of being in control over the final result. When I do my own nails, I have complete control over the shape, length and color. My hands are visible all the time—I don’t have time for mistakes!
These days there are plenty of options for at-home manicures. Here are some guidelines for choosing and using them:
Disk is a contributor at DiskManicure. We are committed to providing well-researched, accurate, and valuable content to our readers.
You May Also Like
Try Our Professional Nail Care Tools
Get accurate calculations for perfect manicures every time.